Active Storm Ops
Map Monitoring View
The Map Monitoring view is the first page that users see when logging in, and can also be accessed from the navigation menu on the left under ‘Active Storm Ops’ option. This page is used to view near-real time visual updates during a storm event. The Map Monitoring view consists of the following elements:
- A map based on the service area that is covered, with the borders and boundaries of a county (or other entity such as district, city, state, etc.), along with borders of depots within that entity
- A visual of markers on the map that represent Drrivers, routes, road hazards, tickets, and clusters when the map is zoomed out
- A panel to the left of the map with two tabs for Routes and their current status, along with Drivers and their current status
- A set of filters above the map that allow to narrow or expand what is displayed on the map
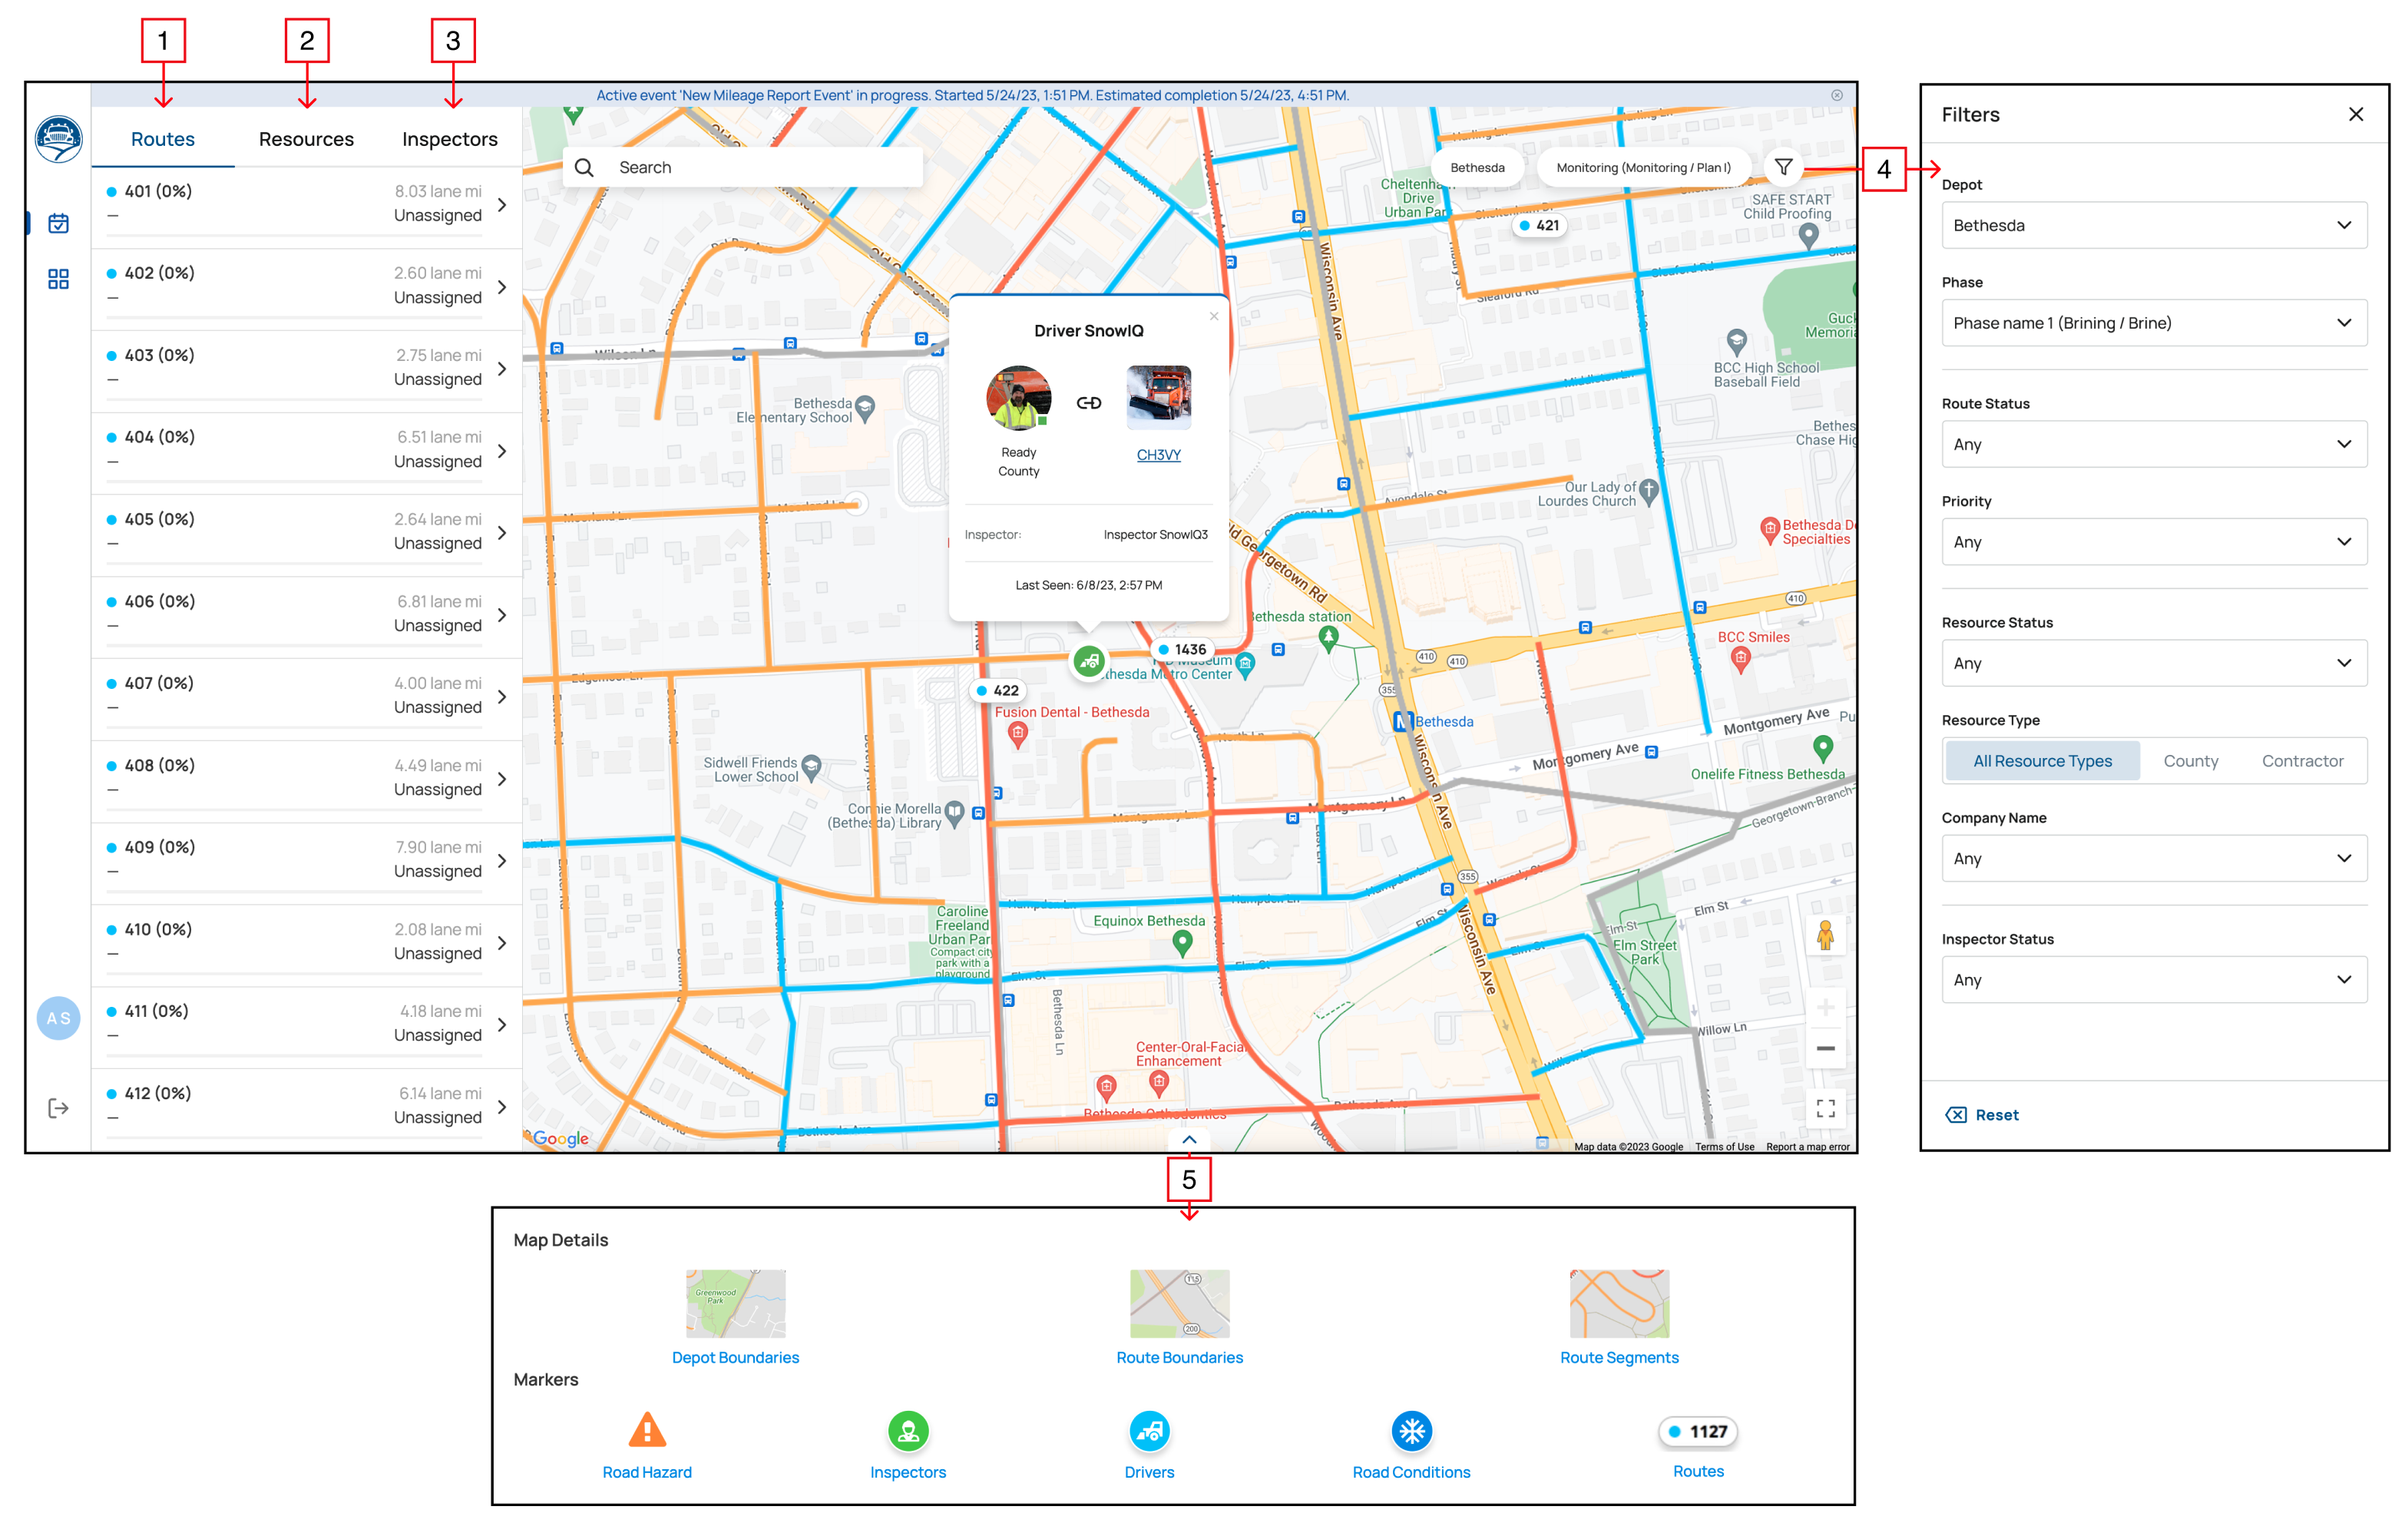
1. Routes Tab
The Routes tab located to the left of the map as shown below and displays a list of routes with their corresponding route name and number, along with a status indicator (color coded – see markers), the total number of miles on the route, and the percentage of completion if there is an active assignment. Applying Filters above the map will filter the routes on this tab as well. Selecting any of the route labels within the tab focuses on that single route on the map.
2. Resources Tab
The Resources tab to the right of the Routes tab is shown below and displays a list of Resources with their names and statuses (color coded – see markers and Status Descriptions). When selecting a Resource from the list, resource details will be displayed above their icon which is located on the ma,p as shown below. This provides additional details like the Driver’s photo, Supervisor name, and the last time the Driver was seen using the Driver App (DA).
3. Inspectors Tab
The Inspectors tab contains a list of all the Inspectors, along with filtering options.
4. Filters
Using the filters at the top of the Map Monitoring view allows users to filter what is seen on the map. Setting a filter can add or remove map elements such as route outlines, routes of different priorities, and routes or drivers that belong to a specific depot. Below are the filters and their options:
5. Map Legend
Selecting the arrow in the lower part of the map opens the slider with a map legend where the user can turn the display of boundaries segments on or off.
Markers
Drivers
| Icon | Status |
|---|---|
 | Contractor Logged-In |
 | Contractor StandBy |
 | Ready |
 | In Service |
 | In Service on Address Assignment |
 | Paused |
 | Offline |
Tickets
| Icon | Status |
|---|---|
 | New 311 Ticket |
 | New Emergency Ticket |
 | Sent |
 | Assigned |
 | In Progress |
 | Pending |
 | Completed |
Clusters
On the Map Monitoring view, when a user zooms outs, markers with numbers inside them are displayed called ‘clusters’ that de-clutter the map and group together as markers. Clicking on a cluster allows the user to zoom in on that area and view the separated markers on the map.
| Icon | Description |
|---|---|
 | Drivers |
 | Routes |
 | Tickets |